User Guide
This page contains installation details, the user interface with screen shots and a brief description of user functions.
installation
- ICE is a pre-requisite. Full details are provided here.
- Once you have ICE installed just check by running up Python and trying to 'import Ice'.
- The only other thing required is Jack and its Python interface PyJack. Whatever is in your repos should do the job.
- Download the acorn-sdr latest zip from http://code.google.com/p/acorn-sdr/downloads/list. Extract the archive anywhere. You can browse code at the SVN repository at http://code.google.com/p/acorn-sdr/source/checkout. I would not recommend downloading from there though unless using the release tags as I do not keep separate branches for development and release.
- There are a few config files you will need to change paths and IP addresses in.
- At the top level there is a script acorn_bootstrap.sh. Change the path to point to your bootstrap_service.py.
- In conf/ice the files acorn_ice.. have IP addresses. The acorn_ice.config is the local config (all on the same machine) and uses only 127.0.0.1 which is fine to leave. The other two with local and remote in their name should have the IP addresses changed to point to the 'client' side, see below. However, at present I have not done the profiles for remote running.
You will need to do something like this in .bashrc
export PYTHONPATH="/opt/Ice-3.3.0/python/:$ACORN_HOME/console:$ACORN_HOME/common:
$ACORN_HOME/dsp:$ACORN_HOME/controller:$ACORN_HOME/softrock:$ACORN_HOME/instr:
$ACORN_HOME/outstr:$ACORN_HOME/../ice:$ACORN_HOME/hpsdr:$ACORN_HOME/hpsdr_dsp:$ACORN_HOME/persistance"
export LD_LIBRARY_PATH=/usr/local/lib:/usr/local/BerkeleyDB.4.6/lib
export PATH=$PATH:/opt/Ice-3.3.0/bin/
The last two depend on whether you built ICE or installed from the repository. If the latter you probably don't need these lines.
running acorn
Single Machine
> cd .../dev/acorn-sdr
> sudo -s
> ./acorn_bootstrap.sh
The sudo is necessary unless you make the parallel or USB devices accessible to users.
Remote
There are no remote profiles set up at the moment, these will come later. Remote works as of the last testing, it just needs some appropriate profiles.Running HPSDR
To run HPSDR the firmware must also be loaded.> sudo -s
Initialize Ozy.
> cd ...acorn/ozy
> ./init.sh
user interface
the bootstrap
Acorn is a set of peer nodes. There is no one in charge. You could run acorn without a GUI, it's not a required node, it could just as easily be a command line program or run through CAT for example. This means there is no node of the system that can be given the responsibility to start everything up. The way round this is to have a special program which is not part of the radio but simply a bootstrap to start the nodes comprising the radio. The bootstrap has a special profile which contains just enough information to get things going. Once the bootstrap completes it exits. The bootstrap allows selection from a number of profiles that define exactly what processes to start.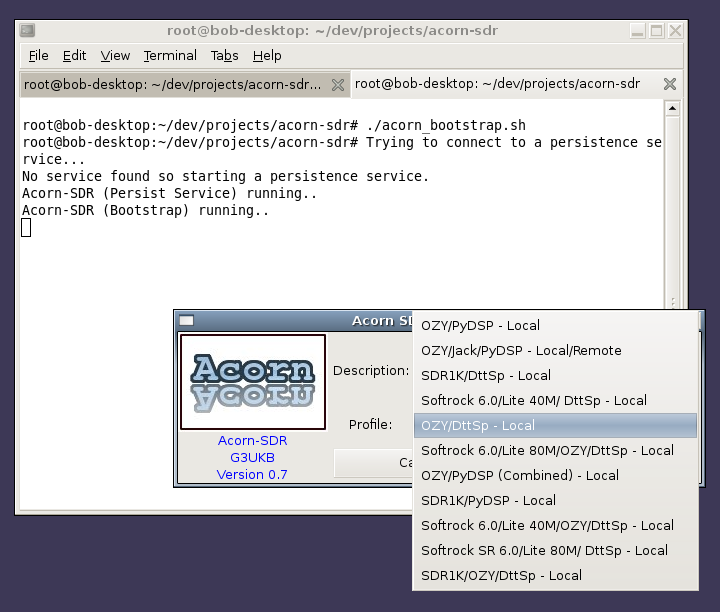
The process first looks for a persistence service incase one is running on the network. If one is not found a service is started. The bootstrap process then reads a special profile section called the bootstrap profile. As the bootstrap itself has a GTK+ GUI it needs the path to the glade file. Also it interacts with ICE and therefore needs to know the location of the ICE config files.
'Bootstrap':
{
'version' : 0,
'description': 'Essential stuff for the bootstrap.',
'path.glade': '/home/bob/dev/projects/acorn-sdr/glade/acorn_main_v01.glade',
'path.ice': '/home/bob/dev/projects/acorn-sdr/conf/ice',
'path.iceconfig': '/home/bob/dev/projects/acorn-sdr/conf/ice/acorn_ice.config',
},
It then obtains a list of profiles from the service and presents them to the user for selection. I am adding profiles quite frequently so this list will grow and I will probably need a better means of selection than a simple drop down.
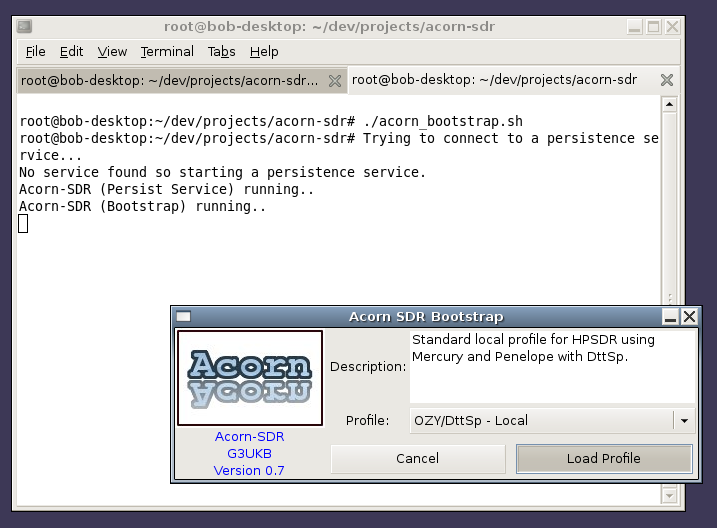
Selecting a profile brings up a description in the text box. To start the system click on 'Load Profile'.
system startup
The selected profile contains the list of processes to start for the profile, and the order in which to start them.
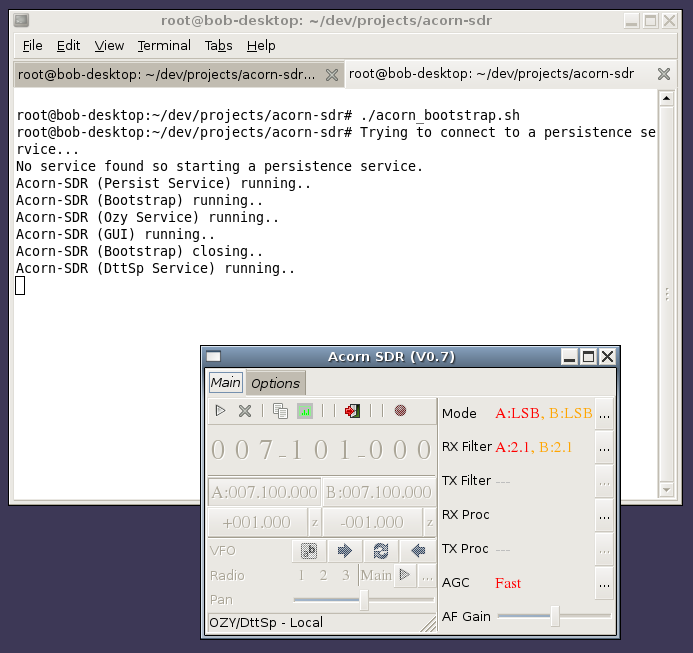
The selected profile in this case (which appears in the status bar) requires the GUI, DttSp and Ozy services. These can be seen starting in the console window. The bootstrap has then finished its job and exits. The initial screen comes up disabled until the radio is started.
the running state
Clicking the run button (play icon) starts the system by sending a start message on the life_cycle interface (for more details see architecture). The GUI will become enabled and ready for use. The system should start receiving signals provided the hardware was powered on and properly initialised.
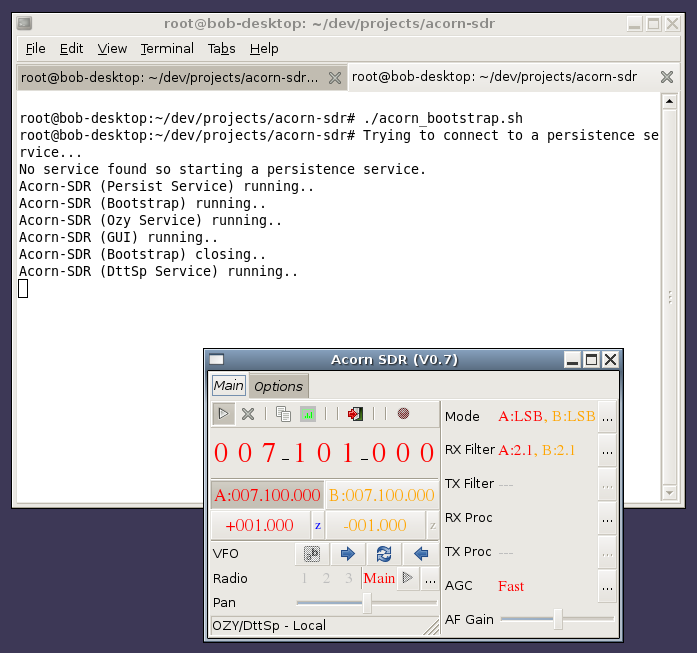
The GUI has a simple layout and is primarily an indicator of radio status in order to keep it concise. The only direct interactors on this panel are the frequency, the VFO buttons and the pan and af gain. The elipse buttons on each row hide the remainder of the interactors.
Starting from the top.
- There is just one set of frequency digits which are scrollable. This is deliberate. I want to keep the interface minimal.
- Below the digits are the A and B frequencies. Selecting A or B brings the digits into the editable region as (1) and of course changes the frequency (and will update any other UI's running). Note that A and B reflect the actually VFO frequency.
- Below the A/B are the offsets. These are supported if the capability says the DSP supports oscillators. Selecting one of the offsets allows the main digits to change the offset and thus the radio frequency. The editable digits (1) will now have the left most digits in orange and will only allow the frequency to be changed +- the maximum offset, which depends on the sample rate.
- Below that are the split, a>b, b<a, a<>b usual VFO stuff.
- VFO to RX Filter are specific to the receiver or sub-receiver selected.
- Radio - selects the receiver, main or sub 1-3. This is enable if the capability says multi-rx otherwise it will be fixed at 'Main'. Selecting the radio means that this UI will now be setting and listening for changes on the selected receiver. Pressing the run buttom runs or stops the selected radio (except for the main radio which is run by the main run button in the toolbar). When a sub-receiver is running it will be shown on all active GUI's by the number being in red.
- Pan - will pan the selected radio.
- Mode - for the default radio this will show the mode selected for A and B, the active mode will be in red and depends on the VFO selected. For a sub-radio it will show the mode of the sub-radio (see dual-watch screen shot later).
- RX Filter - behaves exactly as described for mode.
- The remainder of the rows are common for all receivers. The capabilities will dictate which rows are enabled.
Graphic Displays
The graphic display is invoked by clicking the toolbar button with the spectrum icon. This is a separate process and there can be several displays invoked (not really useful until there is more than one thing to display but useful to determine performance) . Currently 3 displays can be run, the forth starts to affect audio. The display process has not been optimised at all yet and is 100% Python.

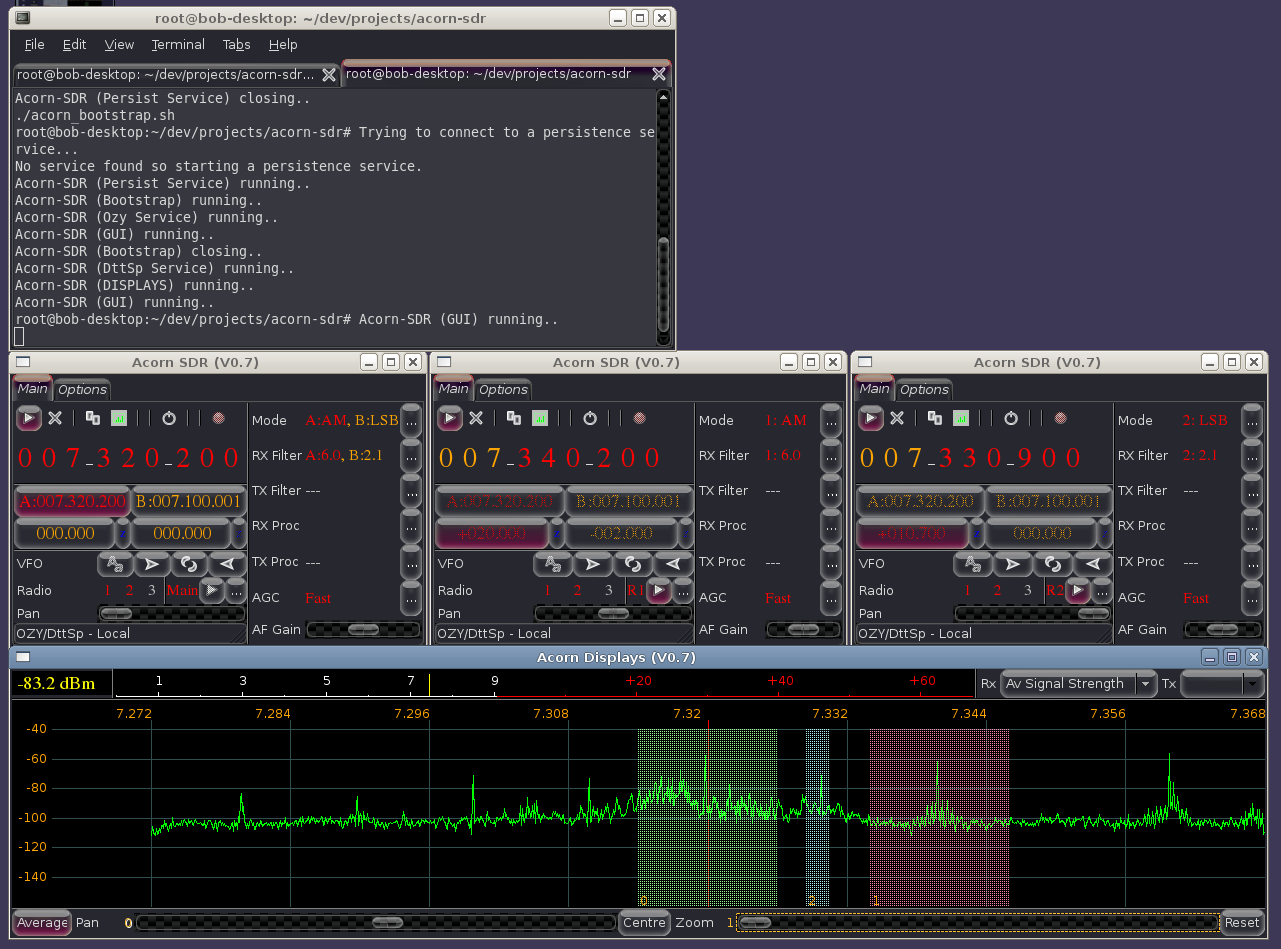
This is pretty conventional as displays go and this shows a SW booadcast station on AM. The filter is 6KHz. The usual click tune is available but apart from that it's a minimal panadapter implementation. I plan to add waterfall and ful spectrum display where the hardware provides it ( as Mercury does for example).
Sub-Receivers
Sub-receivers are a whole subject on their own. Sub-receivers (all 4 of them with DttSp) are fully implemented. Although it's possible to run all 4 from the same GUI it's a little cumbersom. The idea is that the GUI process can be cloned by pressing the clone toolbar button. Each GUI can then be dedicated to one receiver. The graphic display shows where each receiver is listening and will switch is centre frequency depending on which receiver the mouse is over.
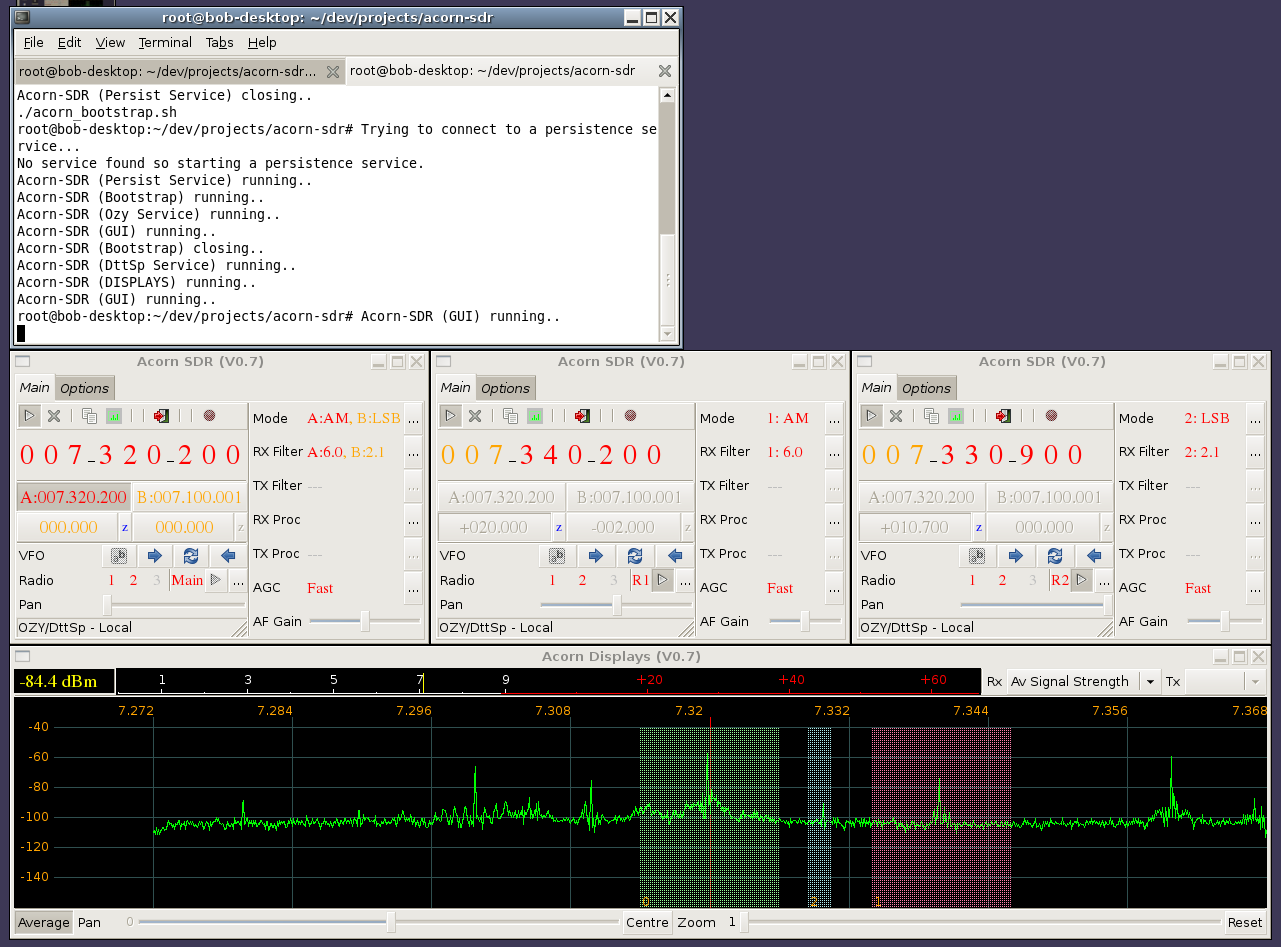
This shot shows a main receiver and two sub-receivers running. The pan is adjusted for main to the left, RX1 middle and RX2 to the right. The sub-receivers can be started and stopped with the run button in the 'Radio' row. The filters and offset frequencies are set for demonstration purposes to separate the areas on the graphic display. Each receiver is shown in a different colour with the radio id in the bottom lect corner. The graphic display is resizable so has been stretched out here to give a nice arrangement.
The same arrangement but with 10x zoom.
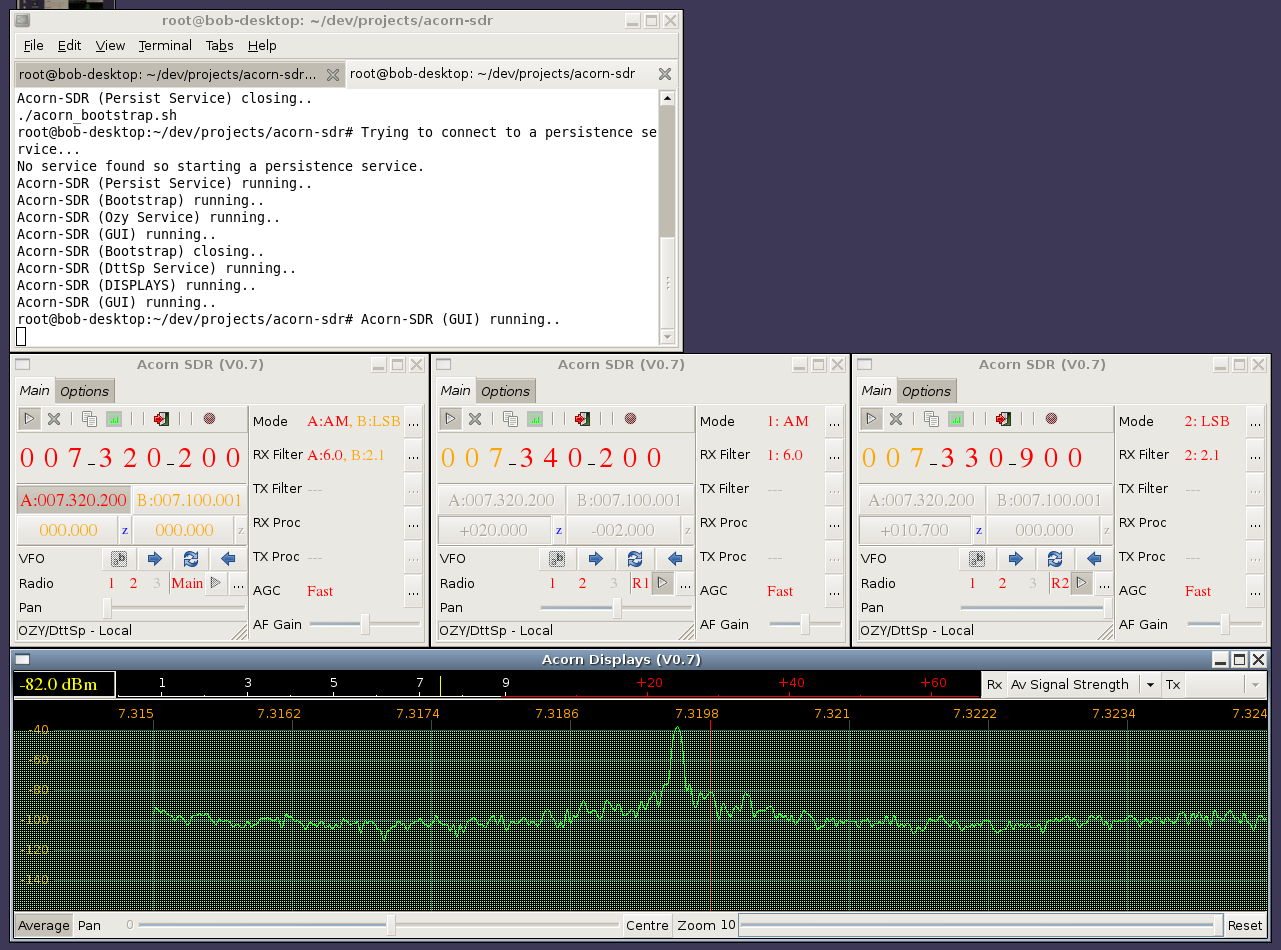
The filter for the main receiver is now covering the entire screen and the other receivers are off-screen.
interactors
All other interactors are accessed via the elipse buttons. This does mean an extra click, but I might add a 'pin' to the popup to keep it up as and when required. I think the trade off of being able to add to the interactors easily or change their form without major interface surgery to me (as a developer) is worth the extra click.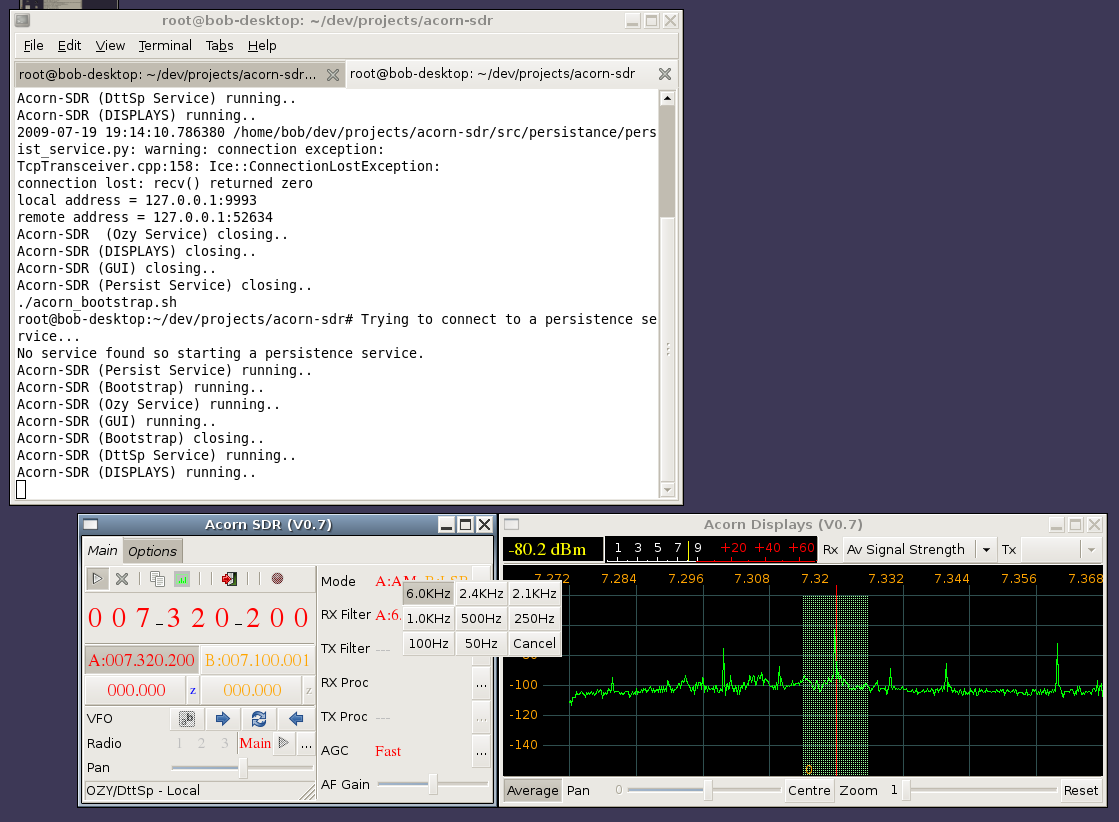
This shows the filter popup window, but the others are similar in form.
options
The options screens are reached via the options tab. If it is required to see the radio screen at the same time as the options then the interface can be cloned.
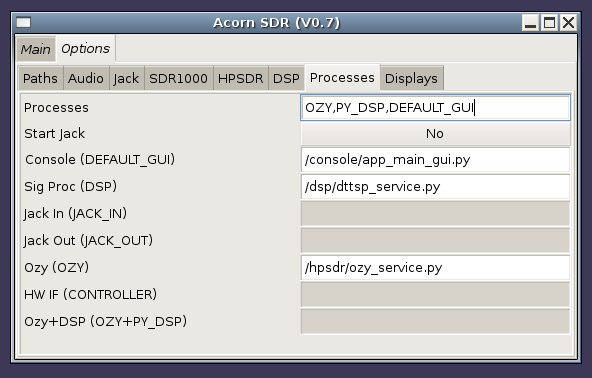
The options are a direct mapping onto the profiles. In the fullness of time all profile and capability attributes will be changeable through the UI, until then some have to be changed via the configuration files. A full description of all options is given in the Model and Configuration section. Options that are immediate acting have red labels, others require a restart. The display level for example is a live adjustment.cloning the interface
other profiles
There are many other profiles and many more to come. The profile changes the system processes that start but may also change the GUI behaviour and disable parts that are not relevent. I will post some pics later.
GTK+ themes
There are many built-in and third party themes available with GTK+. The theme system is quite powerful and just about everything can be changed. I think this theme is a bit OTT but dark themes seem to suit SDR GUI's and there are some quite nice ones in Ubuntu 9.x.